Archive for the ‘gardening’ Category:

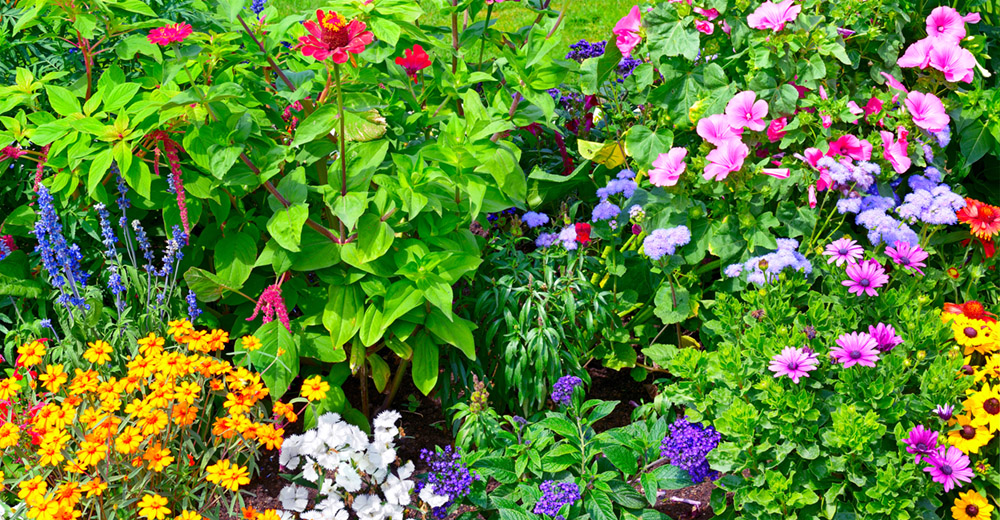
9 Tips for Preparing a Fabulous Flower Bed

Have you ever ended up with a bed of dead flowers, mountains of mulch and a whopping garden center receipt? Let's do something about that, shall we?

Get your gardening groove back with these nine tips.

1. Start with a clean slate

There are two kinds of flower beds: those that have been well-prepared and those that are covered in weeds.

Give your unplanted bed the once-over. Does it get enough sunlight? Does water tend to collect there? Have you removed all weeds, roots and rocks so your plants will thrive? It's a lot easier to fix these problems now than it is once you’ve planted the flowers and laid the mulch.

2. Start seeds

Start a flower bed from seed to save money, raise unusual varieties and enjoy the satisfaction of having grown a whole garden from a handful of tiny seeds.

Since some seeds transplant poorly, check the packet and make sure you don't have to sow directly in the ground. Start seeds in trays, pots or coir pots, using a seedling mixture, place them in a sunny spot, and transplant as soon as they have developed sturdy stems.

3. Prepare nursery plants

Nursery-grown bedding plants give you instant gratification, but the short time between purchase and planting is crucial to their survival.

Pack them closely in your car to avoid damage, and take them home immediately so that they don't fry in your car during other errands.

Water nursery plants as soon as you get home, as often as necessary after that, and a few hours before planting to help their fragile roots survive the trauma of transplanting.

4. Get the winning edge

Even the most carefully planned border can look sloppy without a clearly defined edge. Avoid those inexpensive and quickly deteriorating edges made of plastic, and choose a more natural and long-lasting alternative.

The cheapest solution is to make a shallow trench around the bed with your spade and maintain it throughout the season. For something more refined and permanent, set an edge of brick, concrete or stone in leveling sand. The initial cost may be higher, but they will save you a lot of work and make mowing easier.

5. Plan for the seasons

Choose annuals if you plan on replacing them in a season or two, and plant perennials if you'd like them to last longer. Plant evergreen shrubs or ornamental grasses to provide structure and year-round interest.

Also consider the plant's eventual height. Plant low-growing flowers (usually annuals) at the front of the bed where you can easily view them and replace them at the end of their season.

shutterstock_395790778

6. Give them space

Follow the guidelines on the seed packet or plant tag as closely as possible. An often overlooked factor is the amount of space to leave around each plant so they have room to grow. To cover a lot of ground quickly, choose spreading varieties like Superbells and climbing nasturtiums.

7. Dig the perfect hole

Dig each plant's hole to be twice as wide as the original pot so the roots will have plenty of room to grow. To give them an even better head start, make a little trench around the inside of the hole so the roots will spread down and out.

This step isn't necessary for annuals, since they won't be around long enough to enjoy their strong root systems, but it is helpful if you have clay soil.

8. Plant it right

When planting transplants and nursery plants, always place them so that their crowns (where the plant meets the soil) are level with the soil in the bed. If the crown is above the soil level, the plant may dry out when soil washes away from the roots. If planted too low, soil will settle around the crown and rot the plant.

Push the soil around the transplant and firmly tamp it in place with a trowel so no gaps are left between the roots.

9. Mulch mindfully

Mulch is essential for conserving moisture and preventing weeds, but one inch is all you need. Established garden beds don't even need mulch because the plants themselves are capable of protecting the soil.

Avoid landscaping fabric, since it actually keeps moisture from percolating into the soil. Instead, lay down sheets of newspaper before mulching.

Mulches vary by region, but whichever kind you use, follow this one rule: Don't ever pile it up against the plants. They'll rot in no time, and you'll soon have nothing more than an ugly bed of mulch in their place.

Related:

Originally published April 2016.

5 Tips for Spring Lawn Prep

Even if your lawn is made up of weeds more than actual grass, you can turn it around with some basic spring maintenance. Try these five tips to get your lawn ready before the weather warms up and the grass (and weeds) leave you in the dust.

Prevent weeds

Proper mowing, irrigation and feeding practices are the best possible weed prevention, but established weed populations require drastic measures.

Use a preemergent herbicide to stop warm-season weeds before they sprout. And even a weed-free lawn can easily be undone by nearby weeds and their traveling seeds, so remove any weeds in the garden now so they don't find their way into your lawn.

If your lawn has bare spots, fill them in now with sod or seed so weeds don't sprout and get a foothold.

Start your engines

Much like cars, lawnmowers will stop working without routine maintenance. If you haven't already done so in the fall, replace the mower's oil and gas with the types recommended in your mower's instruction manual.

This would also be a good time to replace that corroded spark plug and dirty air filter. Add a fuel stabilizer to keep the gas from going stale and harming the mower's engine.

A dull mower blade makes your grass more susceptible to disease with each ragged cut it makes, so sharpen the blade with a metal file when it starts to get dull. Clean your mower often to improve performance and prevent corrosion. If you own a riding mower, air up the tires for an even cut and comfortable ride.

Clear out thatch

You know that spongy layer of dead grass that builds up in your lawn? That's thatch. A thin layer of thatch is normal and even healthy, because it protects the soil, roots and beneficial organisms. But when that thatch gets about an inch tall, drought, weeds and other problems develop.

Thatch is most likely to build up in lawns that have acidic or compacted soil - or lawns that have been excessively treated with herbicides and pesticides. If thatch is common on your block, prevent it with core aeration. This allows air to reach the soil, promoting organisms that naturally break down thatch. Use a vertical mower or power rake if the thatch is an inch thick or more.

Reseed and resod

None of these tips will do much good without a proper lawn. If your lawn feels beyond hope, consider starting from scratch.

If your existing lawn is an annual one, remove it with a sod cutter. Perennial grasses, like Bermuda or St. Augustine grass, are much tougher to remove, so you'll likely have to either solarize with clear plastic sheets for several weeks or resort to an herbicide.

Once you’ve dug up the grass or otherwise eradicated it, replace it with soil and a grass variety appropriate to your region. Plan on setting aside a day or two for installation.

Amend the bare soil with topsoil or composted manure, and lay down the sod or planting seeds by following the label instructions. After planting, water it often until the new grass becomes established.

Start good habits

If you're not already following a fertilizing schedule, start one now by following the directions on your product of choice. You will likely forget this schedule after the first feeding, so pencil in the dates on your calendar so you don't get off track.

Start the season off right by mowing more often, on a higher setting and in alternating directions. Inspect your sprinklers and pipes for possible breakage - a patch of damp soil or an excessive water bill would be your first clue. If your lawn seems to let into the surrounding landscaping, start edging now to define your boundaries.

A string trimmer is fine for maintenance, but cutting through the dirt with it could get messy. Either rent an edger or purchase a handheld half-moon tool to make deep, clean cuts that persist through the year for easier mowing and trimming.

Related:

Originally published April 2017.

What Your Houseplants Need to Make It Through Winter

It isn't just you - your houseplants really do look worse in winter. Blame it on dry air, shorter days, changing light patterns, cold drafts - and the fact that some plants go nearly dormant in winter anyway, even in their own habitat.

These obstacles make houseplants more vulnerable to problems like overwatering, poor drainage and pests than ever before, but don't let it bring you down. Instead of counting down the days until spring comes - or your plant dies on its own - follow these guidelines to keep your plants healthy all season long.

Identify your plant's unique needs

Start by treating each plant as an individual. This is especially important in winter. Some plants go dormant and need drier soil, low light and cooler air, while others still want moist soil, bright light and warm, humid air.

So, do a little research. Perform a quick search on your phone or visit the bookstore or library to identify your plants and determine their needs.

If you're still unsure of their identities, follow the general guidelines below and assume they need lightly moist soil, good drainage, ventilation, humidity and a little more attention to keep them pest- and disease-free.

Water the right way

Before you water, make sure your pot has a drainage hole to prevent rot and a saucer to catch excess moisture.

When the top half-inch of soil is dry, water thoroughly with a watering can that has a narrow spout, which keeps you from splashing the leaves and inadvertently spreading soilborne diseases.

Watering deeply promotes healthier root growth and flushes out any excess salts from your tap water that may have accumulated over time.

Provide humidity for jungle plants

Winter’s dry air is uncomfortable for us, but it's even more uncomfortable for houseplants. After all, most common indoor plants come from steamy tropical forests, so they have a hard enough time adapting to household habitats. Worse yet, dry air also leads to pest infestations, like spider mites and mealybugs.

To prevent dry leaves and create a humid microclimate for your jungle-dwelling houseplants, place them on a tray of pebbles and fill the tray halfway with water, which will slowly evaporate and give the immediate area a humidity boost. Otherwise, mist the leaves twice a day or refer to the tip below.

Group plants together by needs

Since houseplants seem to struggle more in winter, group them together by needs to simplify your life and prolong theirs.

For plants that are actively growing (most common houseplants fit this description), choose a well-lit bathroom or kitchen so they can benefit from the extra humidity created by running water.

Place desert plants like cacti and succulents in a south-facing window so they can receive the maximum amount of direct sunlight.

If you have subtropical bulbs or flowering plants that require a rest in winter, place them in a cool area with indirect light and only water them when the potting mix is dry.

Inspect whenever you water

Having a green thumb has nothing to do with luck and everything to do with being observant. Every time you water your houseplants, look closely at the leaves, stems and potting mix. You have nothing else to do while standing there with your watering can, so take the time to appreciate your plant's uniquely patterned leaves and - wait, was that a bug?

Even if you couldn't identify a mealybug if your life depended on it, you'll discover (and remove) all sorts of things if you wipe the leaves occasionally with a damp rag and cotton swab.

Prevent the spread of pests and diseases

Houseplants are especially prone to bacterial diseases this time of year, so pay close attention to them.

Remove and discard any dead leaves that appear or fall in the potting mix - they make ideal hiding places and breeding grounds for pests and diseases. To prevent stagnant air around your plants, increase ventilation with a small fan.

Wash your hands and tools before and after handling them, and immediately separate or discard any diseased or infested plants so they can recover without infecting the others. If the leaves are stunted, mottled and twisted, the plant likely has a virus and should be discarded immediately.

Related:

Originally published February 2017.

Realtor MLS Logo
© 2020 Russell Rich Real Estate | All Rights Reserved