DIY Backyard Fire Pit: Build It in Just 7 Easy Steps

Turn your backyard into a cozy camp spot by making your own fire pit. This DIY project is easy to complete, and you'll be making s'mores around the fire in no time.

Get ready

Before you begin building, consult your local fire code to see if fire pits are allowed in your city and, if so, how far away the fire pit has to be from a structure.

Then, gather your supplies:

  • Bricks for the fire pit wall
  • Gravel
  • Twine or string
  • Tape measure
  • Stake
  • Large shovel
  • Trowel
  • Tamp
  • Level

When purchasing bricks for the fire pit wall, go for something sturdy like retaining wall bricks or concrete pavers. Some home improvement stores even carry bricks specifically designed for fire pits. Use a layer of firebricks, which have a higher heat resistance, on the inner layer of the fire pit as an extra safety measure.

Now that you have all your supplies and you’ve checked your local fire code, you’re ready to build!

1. Create a circle

Pick a spot for your fire pit (ensuring that it is located a safe distance from any structures, bushes or trees) and insert a stake in the ground where the center of the pit will be.

Tie one end of the string or twine to the stake and measure how wide you want your circle to be.

Typically, a fire pit has a diameter of about 4-5 feet. Cut the string and tie the other end to the handle of a trowel. With the string or twine taut, drag the sharp end of the trowel around in a circle, creating a line in the grass.

2. Shovel out the grass

Using a large shovel, dig out the grass inside the circle.

For safety purposes, the hole for a fire pit should be about 6-12 inches deep. Be sure to call 811 before you start digging to ensure there are no utility lines buried under the spot you’ve chosen.

3. Tamp down the dirt

If you don't have a tamp, you can just use the bottom of your shovel.

4. Make sure the circle is level

Get down on the ground with your level to ensure that the surface is ready for the bricks. Keep making small adjustments until it's completely level.

5. Add gravel

Put a pretty thick layer of gravel in the fire pit (at least a couple of inches). Spread the gravel around evenly.

6. Arrange the bricks

After you've spread the gravel around, arrange your bricks in a circle and stack them in layers until the fire pit wall is at least 12 inches tall.

For extra safety, you have the option to put an inner layer of firebricks. Though you don't need to use mortar if the bricks are heavy enough to make a sturdy stack, you can use an outdoor fire-resistant mortar between the bricks for extra stability.

7. Relax and enjoy!

Gather a couple of Adirondack chairs, some firewood, a few friends and campfire treats to get full use out of your new fire pit.


Related:

Originally published July 19, 2017.

This Tiny Home Is Ready for Outer Space

Ground control to Major Tom: Here's a home unlike any other we've seen.

A lifelong architect went intergalactic to find inspiration for one of his latest designs: a tiny home shaped like a lunar lander.

Nestled on the banks of the Columbia River in central Washington, the roughly 250-square-foot home is hexagon-shaped, perched nearly 9 feet above the ground on three massive steel beams.

Inside, earthlings are greeted by an open floor plan. A breakfast nook has a porthole-shaped window overlooking the river and the hillside; a kitchen with stainless steel appliances provides space to cook up a feast for an astronaut.

A large geodesic dome skylight showers the room with sunlight.

Just off the bathroom, a deep-blue sink and cerulean-colored mirror have a Mid-Century Modern feel (appropriate, considering humans first walked on the moon in 1969).

The bedroom sits below a small ladder and can comfortably sleep two people. 

Upstairs, there's enough room for a small outdoor deck where you can gaze at area wildlife, including eagles and lynxes.

If the space reminds you of the tiny well-intentioned living quarters of a boat, it's no coincidence. The lunar lander's owner and designer, Kurt Hughes, is a boat designer by trade.

He translated his three decades of boat building to home building - in fact, the wooden table in the dining nook is recycled from the Hughes' first sailboat.

Beam us up, Scotty.

Photos by Zillow’s Marcus Ricci.

Related:

Originally published May 2018.

Sanctuary: An Astronomer’s Home Observatory

Jonathan Fay lives a double life. By day, he works in software engineering, but once the sun goes down, he opens a window to the heavens - right in his own backyard.

The amateur astronomer designed and built an observatory behind his Woodinville, Washington, home to house his 12-inch telescope. There, he gazes at planetary nebula and photographs galaxies. For Fay, having his own sanctuary is out of this world.

How would you describe your sanctuary?
My observatory is a place of peace where I can collect my gear and spend time with the universe. The nature of astronomy in the Pacific Northwest is challenging, but I’m able to open the dome and start observing without having to set up ahead of time and rush to cover things up when it rains.

What do you like best about the physical space?
It’s separate from the activity of my home, and it’s quiet. I don't disturb anyone else, and they don't disturb me.

What's your home like? Is your sanctuary an extension or departure from your home?
Our home is a two-story wood and brick home. The observatory blends nicely with the house and barn in style, but the dome clearly sets it apart.

Did you have your sanctuary in mind when you chose your home?
No. A few years after I moved in, I realized I needed a more permanent place than a second-floor porch off the bedroom to set up my new telescope.

What was the tipping point that made you decide to create a sanctuary?
When I would do astrophotography imaging runs on the second-floor porch, people would turn on lights or walk around, and the light and vibration would ruin the image. My wife didn’t like having to shut down her life for my hobby.

How did you build your sanctuary?
I designed and built the observatory. I had some occasional help from friends when I needed lifting or a second pair of hands. I also had help from my kids handing me screws and nails while I worked.

Sanctuary_Fay_exterior_05

What was the biggest challenge in creating your sanctuary?
Round stuff is hard. Especially when it has to rotate and be level. The dome was a hemisphere, so it was round in more than two dimensions. Woodworking tools are not optimized for round things.

Has your sanctuary always looked the same, or has it changed over time?
We recently added wood floors from carpet. And we put on a new roof when we re-roofed the rest of the buildings on the property.

How much time do you typically spend in your sanctuary?
Sometimes many hours for several days in a row. Sometimes I go weeks without going inside. It depends on the ebb and flow of life - and how bad I need it.

How did you get into astronomy in the first place?
My aunt gave me a telescope when I was about 12. Since then I have loved space and astronomy, but when I could put a computer-controlled camera on a telescope, that made me want my own Hubble in my backyard.

Sanctuary_Fay_interior_01

Does your hobby influence what you do professionally or vice versa?
Building my observatory, writing all the software for it, and doing astronomical imaging helped me create the WorldWide Telescope project with two of my co-workers. Now millions of people can visit space on their computer or planetarium because of it.

Do you share your sanctuary with anyone? What about your home?
I will share the observatory with just about anyone who asks, and sometimes I invite people to join me. I share my home with my wife and five active kids. So sometimes a getaway is in order!

Sanctuary_Fay_portrait_08


If you had a do-over, would you change anything about your sanctuary?
While I love the look of the dome, I would make the shutters open wider to accommodate a bigger telescope.

Do you wish you had found your sanctuary sooner?
It came at the right time for me, and I returned to update it when that time was right.

What advice would you share with those who dream of having a sanctuary someday?
You’re not getting any younger. Just go for it, even if you don't use it as much as you think you need to to justify the cost. It will always be a great story to share.

Related:

Originally published July 2016.

Sleep Under the Stars in a Bubble Home

Why live on the bubble when you can experience life inside it?

It's an appropriate question to ponder while gazing at the forest from inside this unusual dome home in upstate New York.

Made to maximize views while maintaining partial privacy, this geodesic bubble tent is equal parts glamping destination and fishbowl. It's the perfect place to observe nature without fully immersing yourself in it.

Copyright 2018 Leon Cato Photography.

Tucked away on a farm in Woodridge, New York, the dome is surrounded by a thicket of trees and sits just feet away from a greenhouse, a vegetable garden and a pond.

Copyright 2018 Leon Cato Photography.

Ample windows offer views of the natural environment, and screened-in panels allow airflow but deter mosquitoes in the summertime.

Copyright 2018 Leon Cato Photography.

Still looking to bask in nature? Two outdoor showers and a clawfoot tub allow you to scrub and soak near the sugar maples.

Copyright 2018 Leon Cato Photography.

An open-air kitchen and grill offer up the chance to dine alfresco.

Copyright 2018 Leon Cato Photography.

The home is currently available as a short-term rental in the Catskill Mountains, roughly 95 miles from the heart of Manhattan.

Copyright 2018 Leon Cato Photography.

Bonus: Guests can interact with animals on the property (hello, goats!) and enjoy a recording studio, hiking trails or a weekly yoga class.

Copyright 2018 Leon Cato Photography.

Top featured image by George Apostolidis (portfolio, Instagram). 

Related:

Originally published May 2018.

9 Tips for Preparing a Fabulous Flower Bed

Have you ever ended up with a bed of dead flowers, mountains of mulch and a whopping garden center receipt? Let's do something about that, shall we?

Get your gardening groove back with these nine tips.

1. Start with a clean slate

There are two kinds of flower beds: those that have been well-prepared and those that are covered in weeds.

Give your unplanted bed the once-over. Does it get enough sunlight? Does water tend to collect there? Have you removed all weeds, roots and rocks so your plants will thrive? It's a lot easier to fix these problems now than it is once you’ve planted the flowers and laid the mulch.

2. Start seeds

Start a flower bed from seed to save money, raise unusual varieties and enjoy the satisfaction of having grown a whole garden from a handful of tiny seeds.

Since some seeds transplant poorly, check the packet and make sure you don't have to sow directly in the ground. Start seeds in trays, pots or coir pots, using a seedling mixture, place them in a sunny spot, and transplant as soon as they have developed sturdy stems.

3. Prepare nursery plants

Nursery-grown bedding plants give you instant gratification, but the short time between purchase and planting is crucial to their survival.

Pack them closely in your car to avoid damage, and take them home immediately so that they don't fry in your car during other errands.

Water nursery plants as soon as you get home, as often as necessary after that, and a few hours before planting to help their fragile roots survive the trauma of transplanting.

4. Get the winning edge

Even the most carefully planned border can look sloppy without a clearly defined edge. Avoid those inexpensive and quickly deteriorating edges made of plastic, and choose a more natural and long-lasting alternative.

The cheapest solution is to make a shallow trench around the bed with your spade and maintain it throughout the season. For something more refined and permanent, set an edge of brick, concrete or stone in leveling sand. The initial cost may be higher, but they will save you a lot of work and make mowing easier.

5. Plan for the seasons

Choose annuals if you plan on replacing them in a season or two, and plant perennials if you'd like them to last longer. Plant evergreen shrubs or ornamental grasses to provide structure and year-round interest.

Also consider the plant's eventual height. Plant low-growing flowers (usually annuals) at the front of the bed where you can easily view them and replace them at the end of their season.

shutterstock_395790778

6. Give them space

Follow the guidelines on the seed packet or plant tag as closely as possible. An often overlooked factor is the amount of space to leave around each plant so they have room to grow. To cover a lot of ground quickly, choose spreading varieties like Superbells and climbing nasturtiums.

7. Dig the perfect hole

Dig each plant's hole to be twice as wide as the original pot so the roots will have plenty of room to grow. To give them an even better head start, make a little trench around the inside of the hole so the roots will spread down and out.

This step isn't necessary for annuals, since they won't be around long enough to enjoy their strong root systems, but it is helpful if you have clay soil.

8. Plant it right

When planting transplants and nursery plants, always place them so that their crowns (where the plant meets the soil) are level with the soil in the bed. If the crown is above the soil level, the plant may dry out when soil washes away from the roots. If planted too low, soil will settle around the crown and rot the plant.

Push the soil around the transplant and firmly tamp it in place with a trowel so no gaps are left between the roots.

9. Mulch mindfully

Mulch is essential for conserving moisture and preventing weeds, but one inch is all you need. Established garden beds don't even need mulch because the plants themselves are capable of protecting the soil.

Avoid landscaping fabric, since it actually keeps moisture from percolating into the soil. Instead, lay down sheets of newspaper before mulching.

Mulches vary by region, but whichever kind you use, follow this one rule: Don't ever pile it up against the plants. They'll rot in no time, and you'll soon have nothing more than an ugly bed of mulch in their place.

Related:

Originally published April 2016.

Good Clean Fun: How to Build an Outdoor Shower

Outdoor showers may seem like a luxury - something that only those with beach houses would need or be lucky enough to have. But an avid gardener, runner or someone that enjoys the freedom of bathing in nature, you may consider an outdoor shower for your own home.

Lucky for you, outdoor showers are an accessible feature for just about anyone. It all depends on how simple or complex you want your shower to be. A simple outdoor shower with cold water costs approximately $1,000 or less. An outdoor shower with an enclosure and hot and cold water will run about $4,000-$8,000.

Here are four things to consider before taking the plunge on your own little piece of outdoor bathing heaven.

Location

This is one of the most important considerations. It’s best to choose a spot that you use often. In most cases, anywhere near the back entrance to your home is a good choice - maybe adjacent to the back door or on the back deck. If you have a pool, situate the shower nearby for easy rinses before and after swimming.

Another major consideration is plumbing access. Unless you’re installing the type of shower that attaches to a garden hose, you’ll need to install it close to existing plumbing.

Last but not least, go for a sunny spot. This will help keep mold and mildew at bay and provide natural warmth while you rinse.

Privacy

Privacy is a fairly important consideration, unless you think only swimsuit-clad people will use the outdoor shower. You want the shower to feel private and far from prying eyes, but you also want to keep the natural feeling.

Photo from Zillow listing.

An easy and adjustable choice is a freestanding folding screen. These screens work particularly well on decks and patios, where it might be impractical to build any type of wall.

Another option is building corrugated metal wing walls to create a shower “corner” of sorts, where swimmers can rinse off after a dip. You can make this more private by adding a third wall to the design. Of course, there’s always the more elaborate option, which would be to surround the shower with wooden walls.

Plumbing

The simplest and most inexpensive plumbing option, and one that many people choose, is a shower connected to a garden hose, which is then hooked up to an outside faucet. This cold-water fixture is perfect for an outdoor shower that’s used only in the heat of summer and mostly for cleaning off dirt and sand.

Next up is the hot-and-cold hose option. First, you’ll need a plumber to install an outdoor hot-water faucet next to the cold one. From there, it basically works in a similar fashion to the cold-water hose shower.

The most elaborate - and most expensive - is the plumbed-in outdoor shower. This is worth investing in if you anticipate consistent outdoor showers and not just cleaning up after a hot day in the sun. The only downside to this option: If you live in an area with freezing winters, you have to make sure you can fully drain and insulate the plumbing so it doesn't burst.

Drainage

The simplest and most common drainage system is letting the used water drain into your yard. If you don't have very porous ground in your yard, or if the outdoor shower is close to your home, consider attaching the plumbing to your home’s drainage pipes or installing a French drain (essentially a gravel-lined channel connected to a pipe that directs water to a drainage area).

The easiest thing to do, of course, is to go with the first option and recycle the water into your garden.

Accessories

Incorporate affordable accessories that add to the fun and pleasure of showering outdoors. A large rainfall showerhead enhances that outdoor feeling, and plants or flowers in the shower area or peeping through the enclosure add a whimsical touch.

Add some soft solar-powered lights for showering at dusk, install hooks for hanging towels and wet bathing suits, and maybe even add a chair to sit in. Most importantly, design your shower to take advantage of nature’s views, whether that’s the sky overhead or the splendor of your backyard garden.

Photo from Zillow listing.

With just a little planning and effort, you can install your own outdoor shower and stay cool during the sunnier months.

Related:

Originally published June 26, 2017.

9 Homes With Dreamy Spots for April Showers

A good spring shower leaves the earth feeling refreshed and renewed - which is not unlike a good shower in your own home. A well-designed and polished bathroom can invigorate you in the morning or relax you before bed.

These 10 bathrooms in for-sale homes across the country give us that feeling of rejuvenation - and make us just the tiniest bit envious.

Spa-like in the city

For sale: $1.3 million

This Tudor revival in Washington, D.C., is equal parts modern and traditional - and its sleek yet comfortable bathroom is exactly what you’d need after a long day in this busy political city. This bathroom has all the spa features of your dreams, including a soaking tub with ample space for bath supplies, a double vanity with tons of storage underneath and a neutral, calming color palette.

Photo from Zillow listing.

See more homes in Washington, D.C.

A stylish soak

For sale: $1.5 million

This stunning home in De Soto, Wisconsin, is an award-winning architectural structure, but the bathroom is by far the dreamiest of all its spaces. The light hardwoods and paneling contrast beautifully with the slate-gray tub and vanity countertop, and the lighting gives just enough ambience without being too overpowering - perfect for taking a midafternoon soak in the tub on a Saturday.

Photo from Zillow listing.

See more homes in De Soto.

Tan-quility in Texas

For sale: $1.4 million

This bathroom in Austin, Texas, blends neutral tones and contemporary glass to instantly relax you - and add a huge dash of style. A deep soaking tub connects seamlessly to the oversized glass-encased shower, which has a large bench and built-in shelf for bath products.

Photo from Zillow listing.

See more homes for sale in Austin.

Polished and pretty in porcelain

For sale: $595,000

It’s not hard to imagine yourself spending quality time in this light-filled Tulsa, Oklahoma, bathroom. A free-standing curved bathtub sits beautifully right by a picture window, highlighted by a modern light fixture. And right next to it is a glass-encased shower for early mornings when you don’t have time to leisurely take a dip.

Photo from Zillow listing.

See more homes for sale in Tulsa.

A bathing beauty with a view

For sale: $26.5 million

It’s hard to find a favorite thing about this luxury bathroom in Carpinteria, California. Is it the floor-to-ceiling marbled tile or the mountain views as you shower? Whether you love the ceiling-mounted showerhead or the giant tub with cozy built-ins for all your products, this bathroom is an inspiration.

Photo from Zillow listing.

See more homes in Carpinteria.

A grown-up shower to shout about

For sale: $2.9 million

Let us count the ways we love this bathroom in Bellevue, Washington. For one, we can’t get enough of the contrast between the black hexagon tile on the floor and the large white subway tile in the shower. We also love the vessel sink that sits atop an oversize purple-gray vanity, which adds an unexpected pop of color.

Photo from Zillow listing.

See more homes in Bellevue.

A bubble-filled bathroom

For sale: $1.9 million

The light fixtures in this East Hampton, New York, bathroom are reminiscent of bubbles - appropriate for a room with a free-standing soaking tub. Another set of bubble lights sits above the wall-mounted modern sink with plenty of storage underneath.

Photo from Zillow listing.

See more homes for sale in East Hampton.

Large and luxurious in Dallas

For sale: $2.8 million

Everything is bigger in Texas, and this Dallas, Texas, bathroom is no exception. A picture-perfect free-standing tub is framed by two playful light fixtures, as well as an oversized window that lets in a lot of light but still manages to give you privacy, thanks to the trees right outside.

Photo from Zillow listing.

See more homes for sale in Dallas.

Simple yet stately

For sale: $1.9 million

Large marbled tile and a crystal-clear glass shower door make for a beautiful bathroom in Boston, Massachusetts. It’s not especially hard to imagine taking a nice, relaxing shower with that ceiling-mounted showerhead.

Photo from Zillow listing.

See more homes for sale in Boston.

Related:

Maximizing Space in a Small Kitchen

Many homes come with kitchens that are less than ideal. The lighting can be terrible, the appliances old, the floors grimy … and counter space? Well, that’s a nice idea.

Get the most out of the kitchen space you do have with these tips.

Make room

You can create extra space, even when it seems impossible. Over-the-sink covers, cutting boards and colanders help increase your workspace.

Burner covers for your stove and a large cutting board or tray can create extra counter space when you’re entertaining and want to set out snacks (provided you don’t need to use your stove).

Fold-up tables (attached to the wall or stand-alone) offer extra space when needed. If there's room, a butcher block or island instantly create food prep or storage space.

Another simple way to create space? Pare down your belongings - especially on the counters - and only keep the necessities.

Go vertical

A wall above the stove may be perfectly suited for a pegboard where you can hang pots, pans and utensils. Magnetic knife and spice racks can fit into small wall spaces under cabinets or above sinks.

Refrigerators can serve as storage space for magnetic spice racks, towels, pot holders, or dry-erase boards or chalkboards, which are both useful and decorative. And over-the-cabinet hooks and towel racks add extra storage quickly and easily.

Use bookcases

Small bookcases are a kitchen's best friend. They are perfectly narrow, they come in many heights and they offer tons of storage options.

In addition to keeping cookbooks tidy, they can also hold pots, pans, dishes, food items, storage containers and baskets.

Add hooks to the side of your bookshelf to store aprons or other lightweight tools.

Add art and color

Art and color are fast ways to personalize a small kitchen. Color-coordinated kitchen accessories become art in and of themselves, and a simple color palette lets the eye rest in a small space.

When using every inch of space, don't forget to leave room for a few decorative elements. Hang attractive tea towels with pushpins for a practical splash of color. And fresh flowers on a shelf or table instantly brighten the space and add life.

If you have a windowsill, an herb garden is the perfect way to use the space and bring vibrancy. You might even consider installing a vertical garden.

Cover eyesores

Every older kitchen has at least one eyesore: an ancient microwave, a scratched-up refrigerator or a hideous vinyl floor. If you’re not ready to put down the cash for a remodel, cover these as best you can.

Cover exposed sink pipes with curtains attached to the bottom of the sink (bonus: extra storage space). Store your old microwave or replace it with a newer, more attractive version.

As for scratched or just plain ugly refrigerators and appliances, adhesive vinyl can create a like-new look in a matter of minutes.

Cover unsightly floors with kitchen-friendly mats that also make standing at the counter easier on your feet, and refresh old cupboards and drawers with plain or patterned drawer liners.

Upgrade lighting

Lighting in any kitchen is hard to get right. Many fixtures make the space feel dated, and upgrading bulbs and cleaning light covers will make a difference right away. Consider installing adhesive under-cabinet lighting to better illuminate your workspace.

If you can direct your lighting, such as track lighting, make sure it points to the kitchen triangle - that well-worn path from the stove to the sink to the refrigerator.

If overhead lighting is scarce, consider using table lamps and even floor lamps. A floor lamp in a kitchen might seem odd at first, but put it at the end of a counter or tucked behind a table, and you'll be grateful for the extra light.

Related:


Originally published June 6, 2016. 

Roommate Relations: Making Smart Use of Shared Spaces

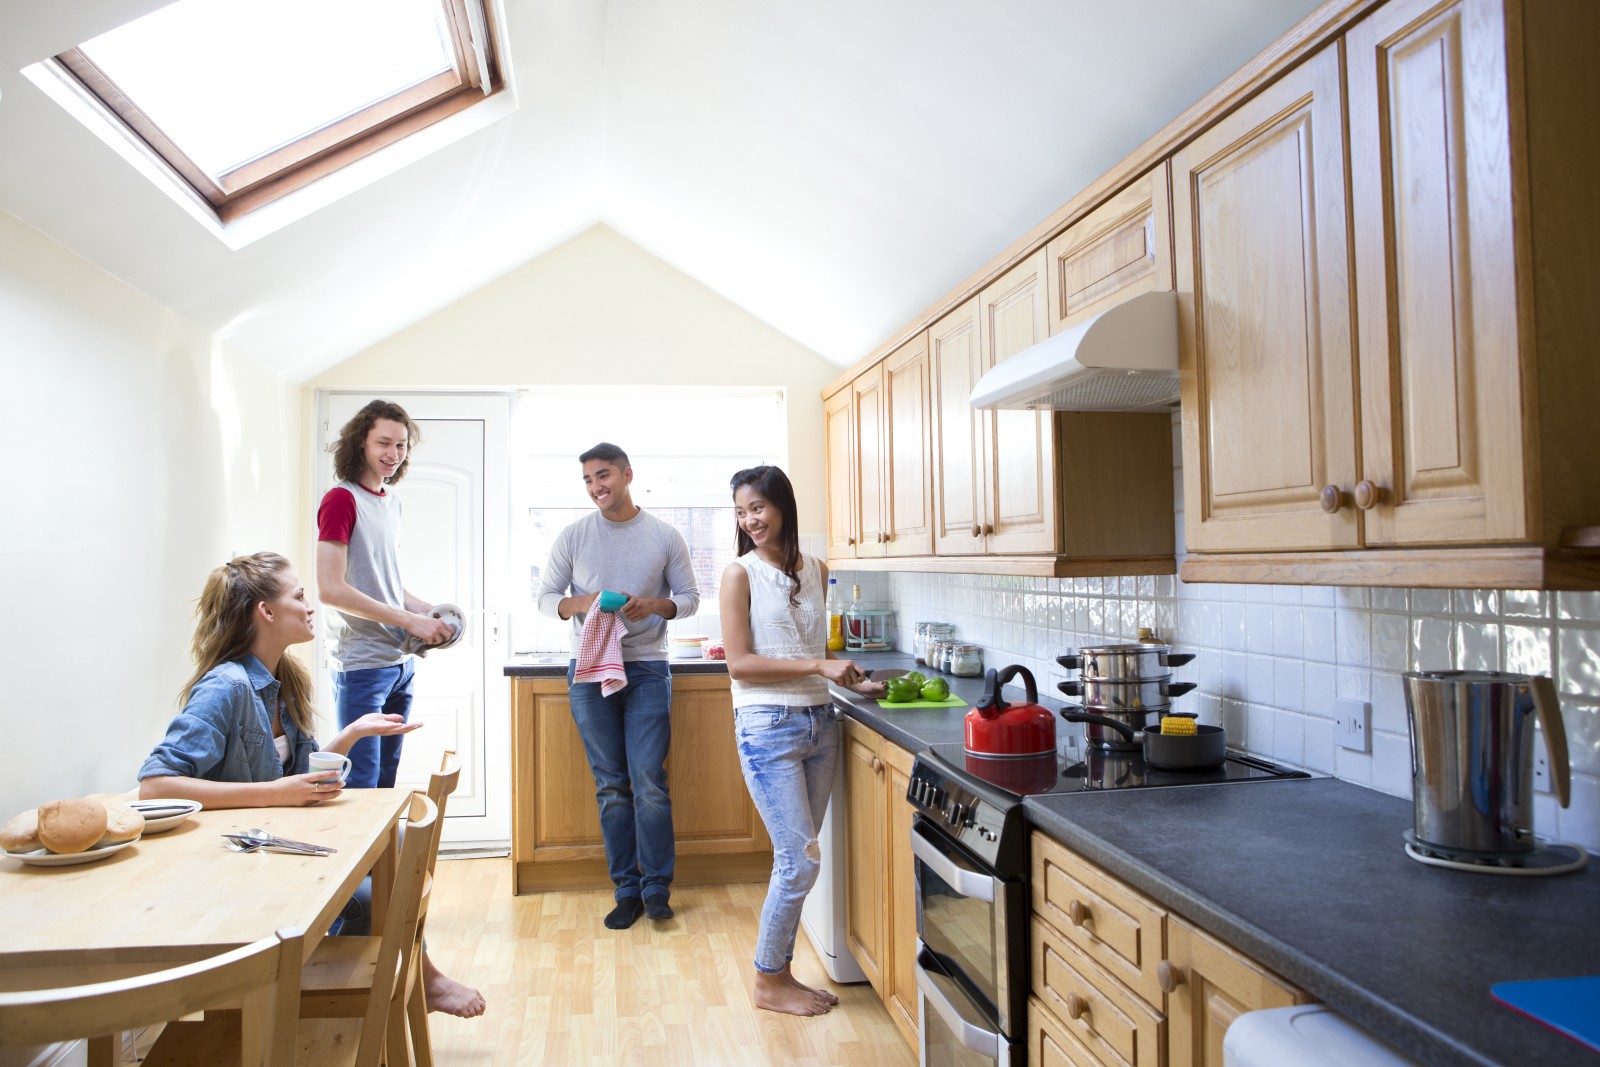
Renting a home with other people can be stressful. But with careful planning and clear communication, living with others doesn't have to lead to passive-aggressive notes and arguments.

Whether you live with your sibling, your bestie or your significant other, try these tips for making smart use of those shared spaces.

Closets

What matters most when sharing closet space is equality. No, you don't need to make a line with tape on your closet floor (please don't). But you should stick to your designated areas.

Hang vertical cloth shelves in the middle to store your shared towels and extra sheets, while also creating a closet divider. And when you toss your shoes in the closet, make sure they're on your side.
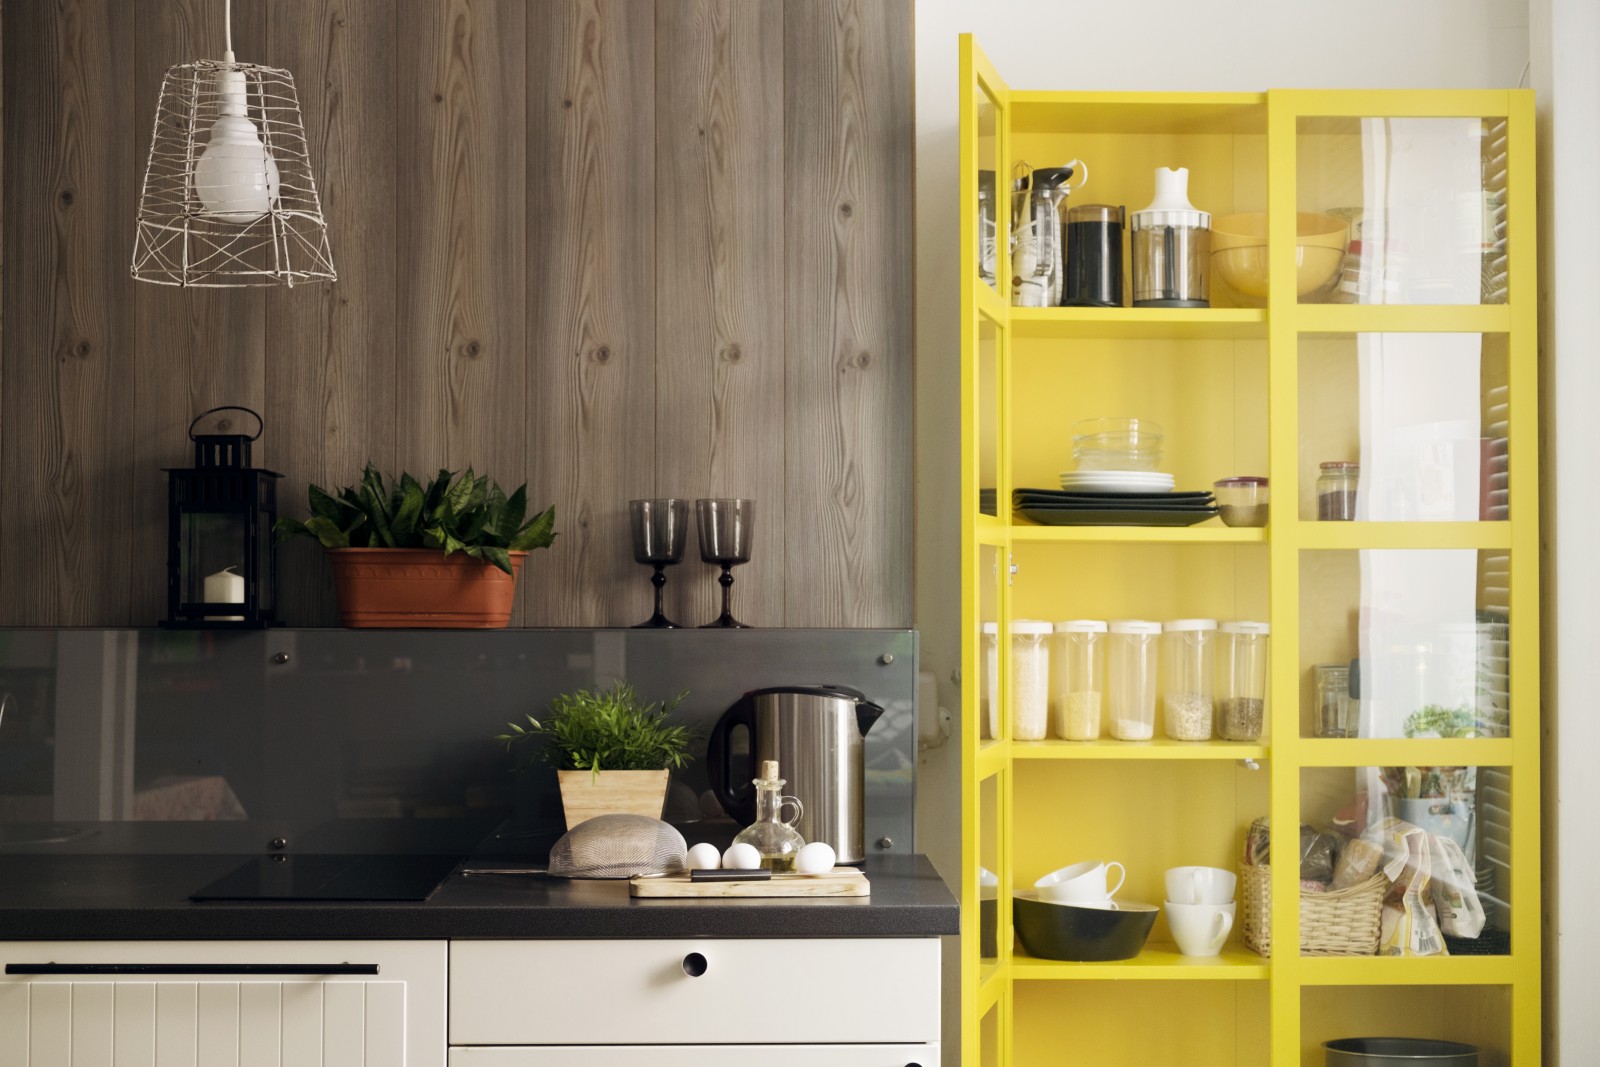
Cabinets

Maximize the cabinet space you're given by adding stackable wire shelving racks. In the kitchen, they’re great for storing plates on top and bowls below. And under your sink, you can put extra sponges, cleaning rags and garbage bags below with your cleaning spray bottles up top.

Storage bins and plastic stackable boxes can also save the day - especially when it comes to bathroom storage. Put your skincare items in one and your dental products in another.

These stackable boxes come in all sizes - the ones with more depth can fit your bulkier products, and the shorter boxes are better for smaller items, like your travel-size products.

Pantry

Once you place those stackable wire shelves in your kitchen pantry, you'll soon learn that labels and plastic bins rule.

If you decide to share spices and other items like flour, vegetable oil and cooking spray, try arranging them in bins with labels that say "Shared." Use more labels to mark shelves and bins with each roommate’s name, if you think you'll all need the reminder.

Countertops

Decide with your roommates if it’s OK to keep items on the kitchen and bathroom counters. It may seem silly to discuss countertop space, but you'll be glad you did.

Decide how many and which items you agree to allow on the counters. Does the toaster that you never use drive your roomie crazy? Are you okay with your BFF's curling iron always being on the bathroom counter?

Air out your countertop pet peeves - you can always find ways to avoid potential disagreements.

The shower

Avoid any possible product mix-ups with a couple of shower caddies. Hang one over the shower head, and put another one (or two) with suction cups on the shower wall. Plus, storing your bath products in hanging caddies leaves the corners of your tub easy to clean.

Storage

If your place comes with its own storage space, try using a tall shelving unit and dividing the shelves equally among you.

If someone ends up slowly taking over the unit, try putting your belongings in labeled plastic bins. If things really get out of hand, see if your storage buddy may be willing to pay a bit more in rent or utilities.

Parking

Your apartment comes with a covered parking spot? Sweet! Oh, it only comes with one parking space? Not so sweet.

Try rotating its use every week or month. Or make an arrangement saying that whoever uses the parking spot can pay more in rent each month. Another idea: The roommate with the covered parking spot could do more chores than the other roommates.

The key is deciding as a team in advance what's fair - and sticking to it.

Pets

If one of you has a pet, how do you decide where the crate, toy basket, and food and water bowls go? It may make sense to put pet items in common areas, but the pet owner shouldn't assume all roommates are cool with squeaky toys all over the living room floor - no matter how cute that pup is.

Just like you'd pick up your things from the living room, you'll want to pick up Fido's stuff too.

Wall space

Don't hang your art in common areas without getting your roommates' opinions first. Turn decorating your walls into a roommate activity. Gather all the art and decorative wall items you want to hang, and have everyone choose their favorites.

You can even turn it into a chance to get to know your roommates better. Have a cool story about where you got that tapestry? Got your favorite mural while studying abroad? Tell your roomies all about it - and listen to their stories too. They may be cool with your wall decor once they know the meaning it holds.

If all else fails, stick with similar color palettes, and decorate based on shared color groupings. Remember that what doesn't go up in the living room can go up in your room.

Space-saving lifesavers

You can use all the fancy organization materials you want, but sometimes the basics are best.

  • Adhesive hooks are great for hanging towels when you need extra bathroom space - or for hanging keys in the entryway.
  • Use shoeboxes to store smaller items like scarves, winter gloves and cosmetics. Label them to make everything easy to find, and you can even decorate them with wrapping paper to pretty them up.
  • Toilet paper rolls are an organizational lifesaver when you have too many cords. Designate each type of cord within one roll, and label them so you never mix up your roommates' cords with yours again.
  • Over-the-door hangers are essential for items like purses and coats. Or try an over-the-door shoe hanger on one side of the door, with your things hung on the other side for double the saved space.
  • Under-the-bed storage containers are key for off-season clothing items or bulky boots that don't seem to fit anywhere else. Your roommate will thank you for the extra closet space.
  • Fabric panels are an inexpensive way to divide a room for added privacy.

Even if the people you live with are not quite as organized as you, rest assured that at least your belongings are contained on their shelves and in their assigned containers. Having smart shared spaces allows you to enjoy your time with your roommates without stressing over whose stuff is whose.

Looking for more information about renting? Check out our Renters Guide

Related:


Originally published September 9, 2016.

5 Tips for Spring Lawn Prep

Even if your lawn is made up of weeds more than actual grass, you can turn it around with some basic spring maintenance. Try these five tips to get your lawn ready before the weather warms up and the grass (and weeds) leave you in the dust.

Prevent weeds

Proper mowing, irrigation and feeding practices are the best possible weed prevention, but established weed populations require drastic measures.

Use a preemergent herbicide to stop warm-season weeds before they sprout. And even a weed-free lawn can easily be undone by nearby weeds and their traveling seeds, so remove any weeds in the garden now so they don't find their way into your lawn.

If your lawn has bare spots, fill them in now with sod or seed so weeds don't sprout and get a foothold.

Start your engines

Much like cars, lawnmowers will stop working without routine maintenance. If you haven't already done so in the fall, replace the mower's oil and gas with the types recommended in your mower's instruction manual.

This would also be a good time to replace that corroded spark plug and dirty air filter. Add a fuel stabilizer to keep the gas from going stale and harming the mower's engine.

A dull mower blade makes your grass more susceptible to disease with each ragged cut it makes, so sharpen the blade with a metal file when it starts to get dull. Clean your mower often to improve performance and prevent corrosion. If you own a riding mower, air up the tires for an even cut and comfortable ride.

Clear out thatch

You know that spongy layer of dead grass that builds up in your lawn? That's thatch. A thin layer of thatch is normal and even healthy, because it protects the soil, roots and beneficial organisms. But when that thatch gets about an inch tall, drought, weeds and other problems develop.

Thatch is most likely to build up in lawns that have acidic or compacted soil - or lawns that have been excessively treated with herbicides and pesticides. If thatch is common on your block, prevent it with core aeration. This allows air to reach the soil, promoting organisms that naturally break down thatch. Use a vertical mower or power rake if the thatch is an inch thick or more.

Reseed and resod

None of these tips will do much good without a proper lawn. If your lawn feels beyond hope, consider starting from scratch.

If your existing lawn is an annual one, remove it with a sod cutter. Perennial grasses, like Bermuda or St. Augustine grass, are much tougher to remove, so you'll likely have to either solarize with clear plastic sheets for several weeks or resort to an herbicide.

Once you’ve dug up the grass or otherwise eradicated it, replace it with soil and a grass variety appropriate to your region. Plan on setting aside a day or two for installation.

Amend the bare soil with topsoil or composted manure, and lay down the sod or planting seeds by following the label instructions. After planting, water it often until the new grass becomes established.

Start good habits

If you're not already following a fertilizing schedule, start one now by following the directions on your product of choice. You will likely forget this schedule after the first feeding, so pencil in the dates on your calendar so you don't get off track.

Start the season off right by mowing more often, on a higher setting and in alternating directions. Inspect your sprinklers and pipes for possible breakage - a patch of damp soil or an excessive water bill would be your first clue. If your lawn seems to let into the surrounding landscaping, start edging now to define your boundaries.

A string trimmer is fine for maintenance, but cutting through the dirt with it could get messy. Either rent an edger or purchase a handheld half-moon tool to make deep, clean cuts that persist through the year for easier mowing and trimming.

Related:

Originally published April 2017.
Realtor MLS Logo
© 2020 Russell Rich Real Estate | All Rights Reserved